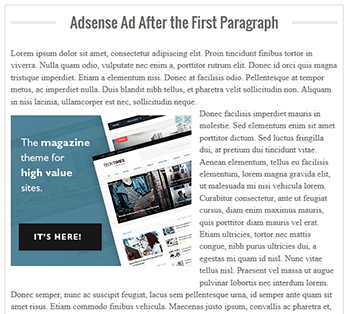
Unfortunately, the default Blogger platform offered by Google doesn't allow placement of ads after the primary paragraph. But because it's become one among the foremost profitable areas, many webmasters have tried to require advantage of the simplest AdSense placement. How can you enjoy the same level of profit?

Steps to Display AdSense Ads after the First Paragraph in Blogger
1. Log into your Blogger account, go to your blog, and click "Theme" on the left side. Click on the dropdown menu beside the orange colour "customise" button and click the "Edit HTML" button.2. Once the editor has opened, click anywhere inside the code area and press the CTRL + F keys (or Command + F) on your keyboard to open the editor's search box. Search for the following below line (press Enter to find it):
<data:post.body/>
Note: You may find multiple occurrences of <data:post.body/> but you need to stop at the second one, or if you don't see any changes, test the last one.
3. Add the below DIVs (which are marked in red) before and after as shown below:
<div id='adsense-target'><data:post.body/></div>4. Copy the AdSense code that you want to paste and use this tool to convert it into plain text. After converting, add the following HTML and replace the "ADSENSE CODE HERE" text with the converted ad code just above the line that we just found:
<b:if cond='data:blog.pageType == "item"'>
<div id='adsense-content' style="display:block;text-align: center">ADSENSE CODE HERE</div></b:if>
Align AdSense Left or Right
Now, the Google AdSense ad will appear in the middle just after the first paragraph. If you are unhappy and want to wrap text around the ad, you can choose one of the options below:a) Align AdSense on the left - change <div id='adsense-content' style="display:block;text-align: center"> with:
<div id='adsense-content' style="display: inline-block;float: left;margin:15px 15px 15px 0px">After modifying it, the ad will display something like this:
b) Align AdSense ad on the right of the content - change <div id='adsense-content' style="display:block;text-align: center"> with:
<div id='adsense-content' style="display:inline-block;float:right;margin:15px 0px 15px 15px">5. Finally, right after <div id='adsense-target'><data:post.body/></div> from step 2, add this script:
<script type='text/javascript'>
function insertAfter(addition,target) {
var parent = target.parentNode;
if (parent.lastChild == target) {
parent.appendChild(addition);
} else {
parent.insertBefore(addition,target.nextSibling);
}
}
var adscont = document.getElementById("adsense-content");
var target = document.getElementById("adsense-target");
var linebreak = target.getElementsByTagName("br");
if (linebreak.length > 0){
insertAfter(adscont,linebreak[0]);
}
</script>
Note:
- If you want to insert the ad after the second paragraph, change "0" from the line in red with "2".
- To put the Ad code just below the heading h2 or heading h3 of a post, replace br from "br" with h2 or h3.
6. Now simply click on "Save" (top right corner) to save the changes and you're done.
With this, you have inserted AdSense Ad after the first paragraph automatically in Blogger. Now it's your turn to decide which Ad format works best for your site.

 Published By:


